How to make video editing your career? Also explains the key to becoming a freelance independent!
ryo
HENSHIN Labo


Transitions are an editing technique in video editing, a feature found in Adobe Premiere Pro and many other video editing software.
This article explains what transitions are, from basic usage to application. Free transition materials are also introduced. Beginners and advanced users alike will be able to relearn about transitions and create more appealing videos.
A transition is an effect or animation inserted when two or more clips or scenes switch.
For example, it is used to smooth the transition from scene A to scene B or to add visual impact.
It is a rudimentary yet profound technique in video production that adds flavor to the video.
Without transitions, a video would be just a collection of sequential scenes, potentially losing visual unity and storytelling. Transitions also serve to create visual flow and help viewers become immersed in the content.
Transitions are not mere embellishments, but elements that deeply affect the quality of the video and the viewer’s experience.
Therefore, the skill to effectively use transitions in video editing software such as Premiere Pro is essential to creating high-quality videos.
Premiere Pro comes standard with many transition presets. Using these presets will greatly streamline your editing work.
The following is a basic explanation of how to use the presets.
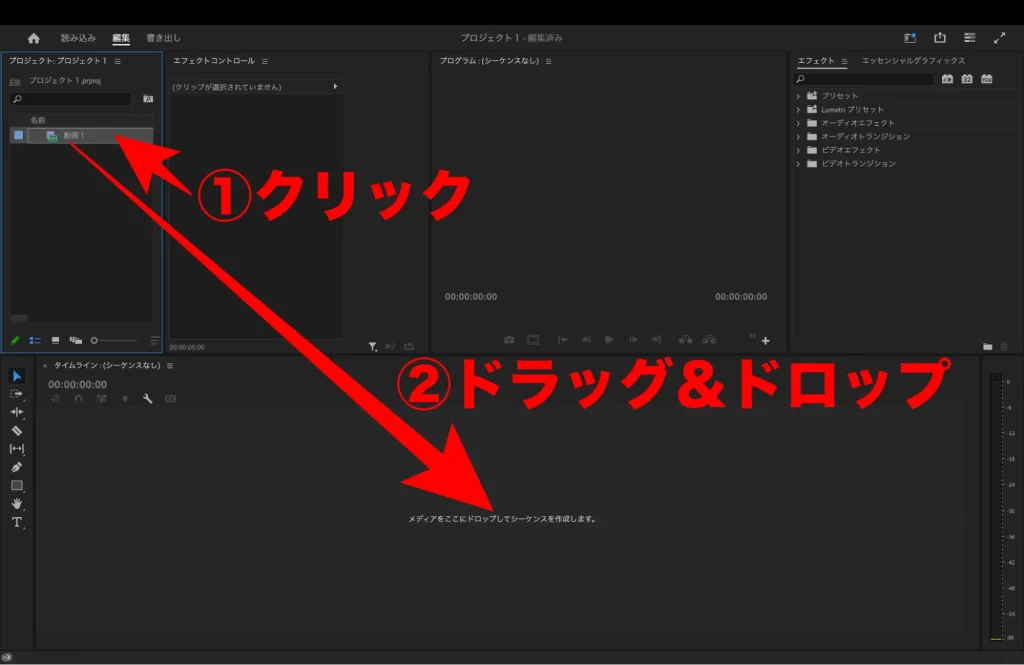
Drag the clip you wish to edit from the Project Panel to the Timeline.
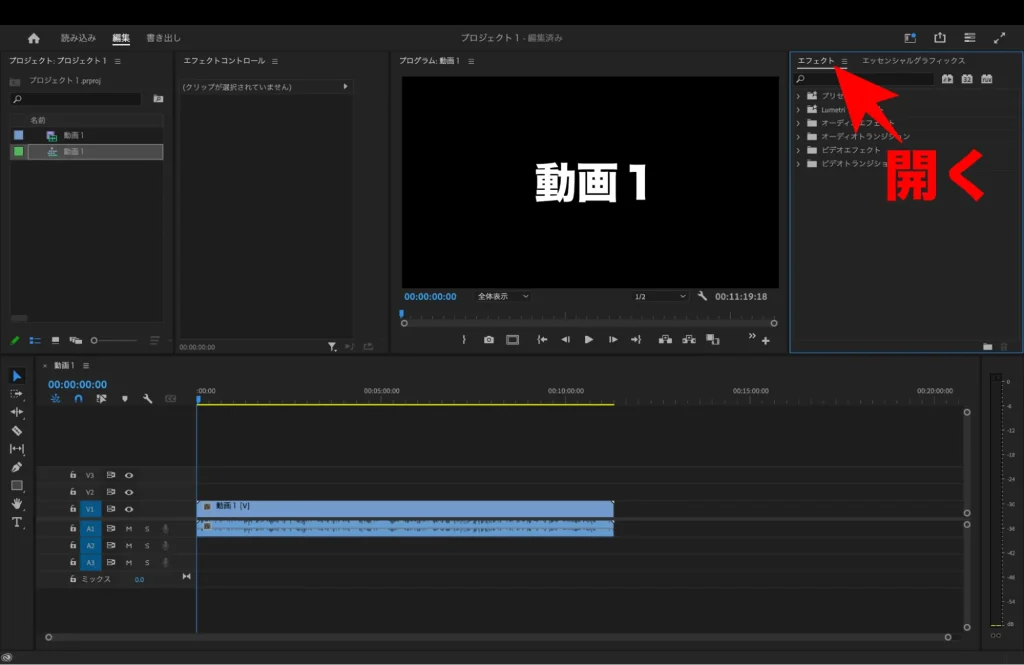
Open the “Effects” panel from the menu on the right.
If you do not see the “Effects” panel, you can display it by selecting “Effects” from the “Window” menu on the menu bar.
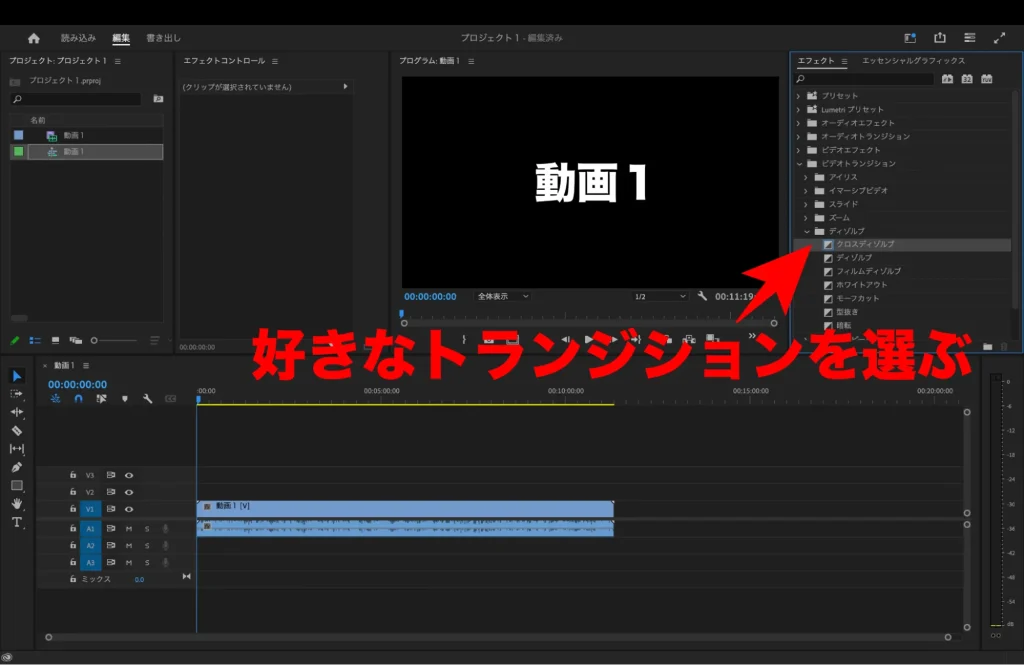
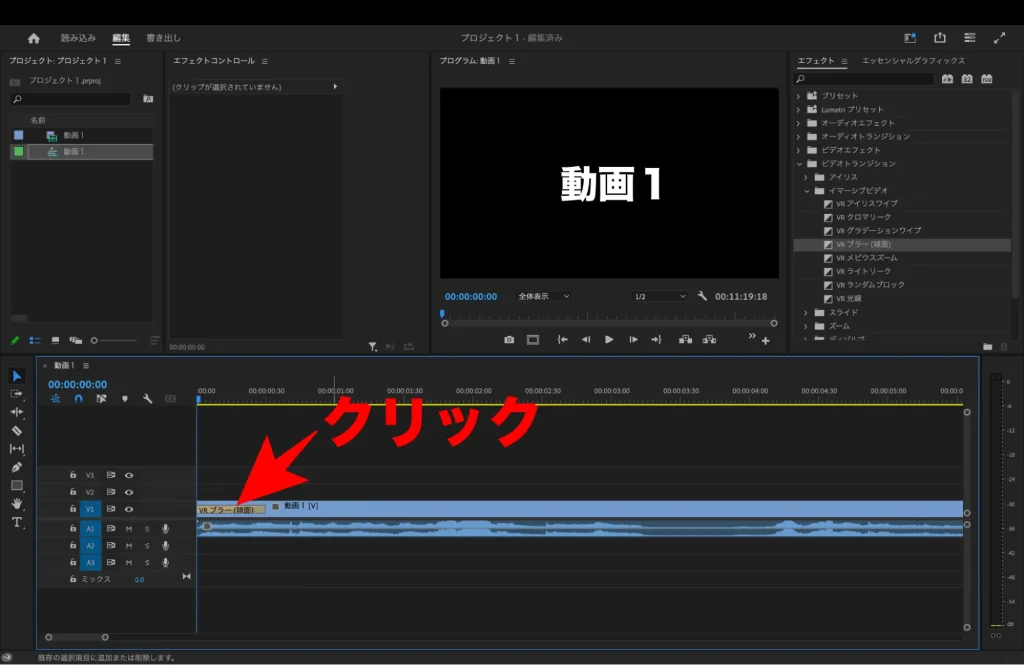
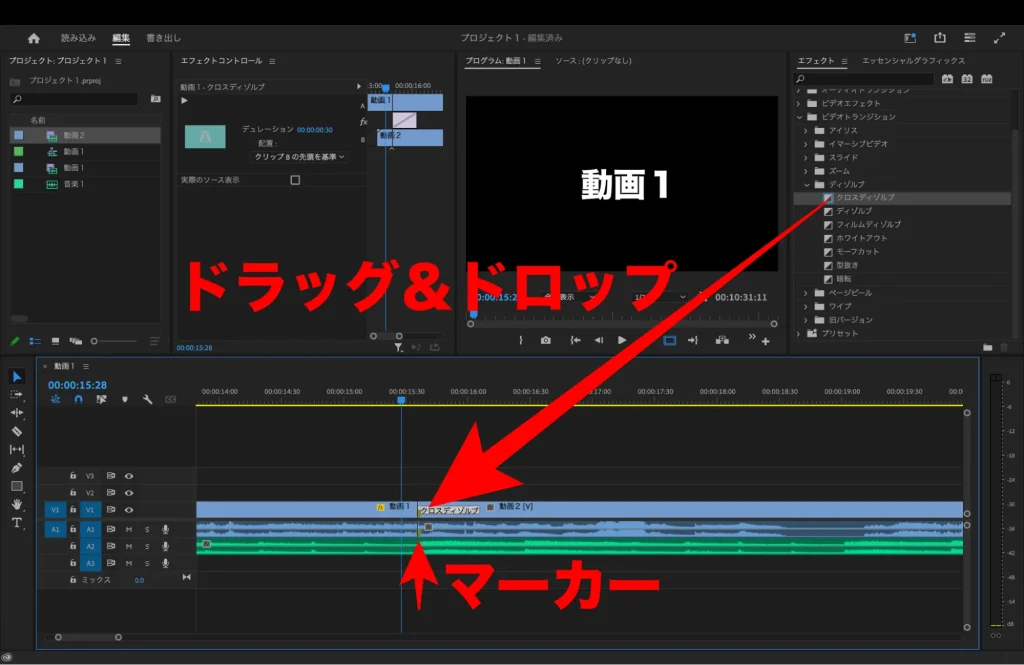
In the “Effects” panel, find the Transition category and select the transition preset of your choice.
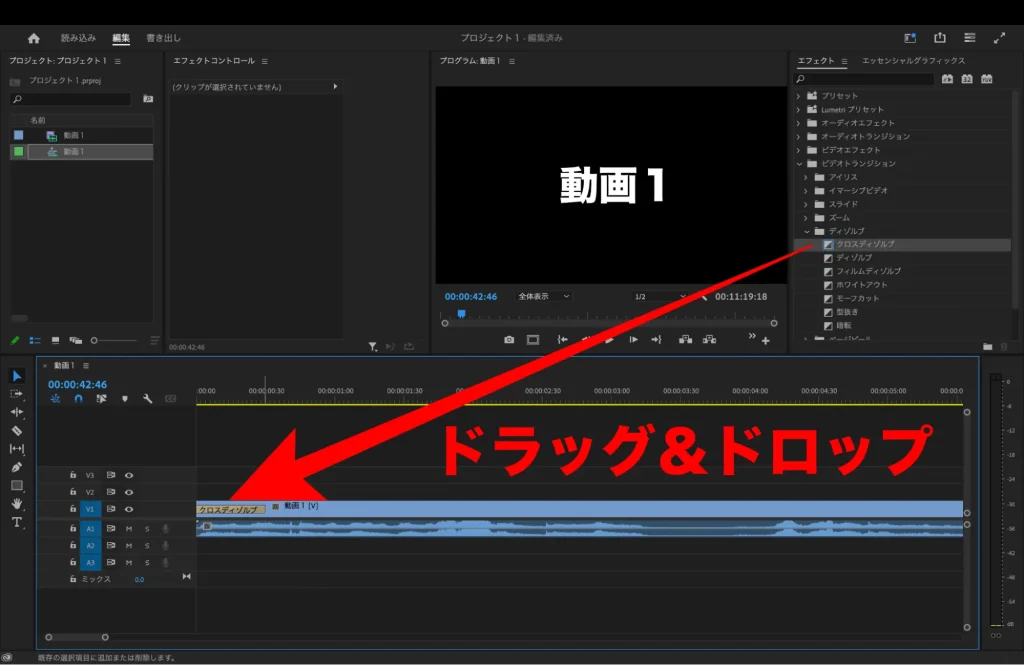
Drag and drop the selected preset onto a clip on the ti。
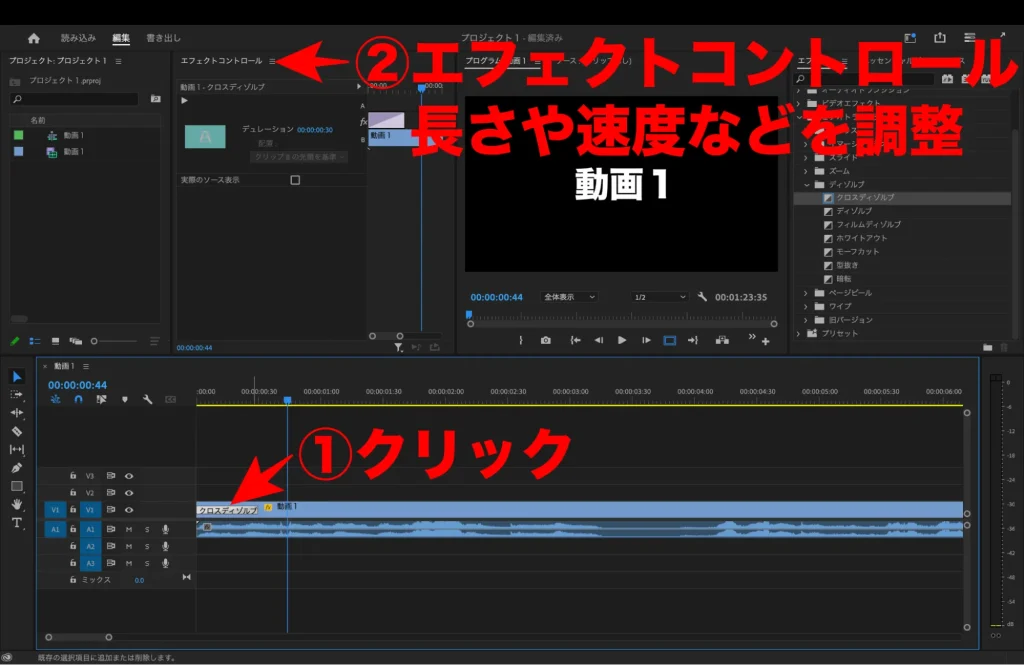
Double-clicking a transition on the timeline opens the Effects Control Panel. Here, you can adjust the length, speed, etc. of the transition.
In this way, you can efficiently use Premiere Pro’s transition presets. Presets are widely used by beginners and professionals alike, and are a powerful tool for smooth editing.
From here, we will explain in detail how to adjust transition properties.
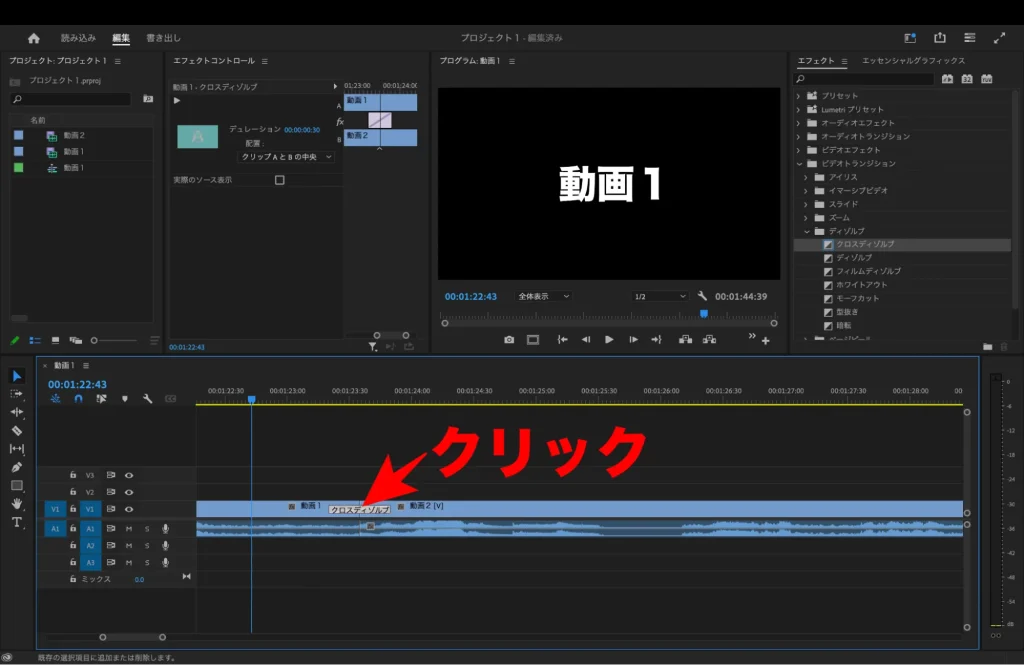
On the timeline, click to select the transition you wish to adjust.
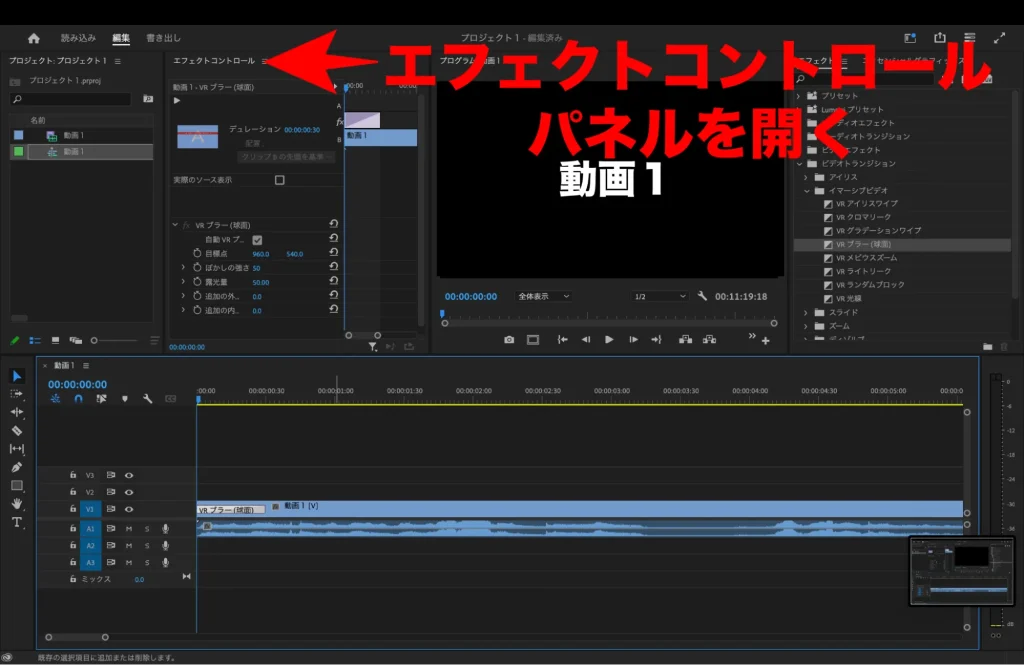
Open the “Effects Controls” panel. This is usually located at the top of your workspace.
If you do not see the “Effects Controls” panel, you can bring it up by selecting “Effects Controls” from the “Window” menu bar.
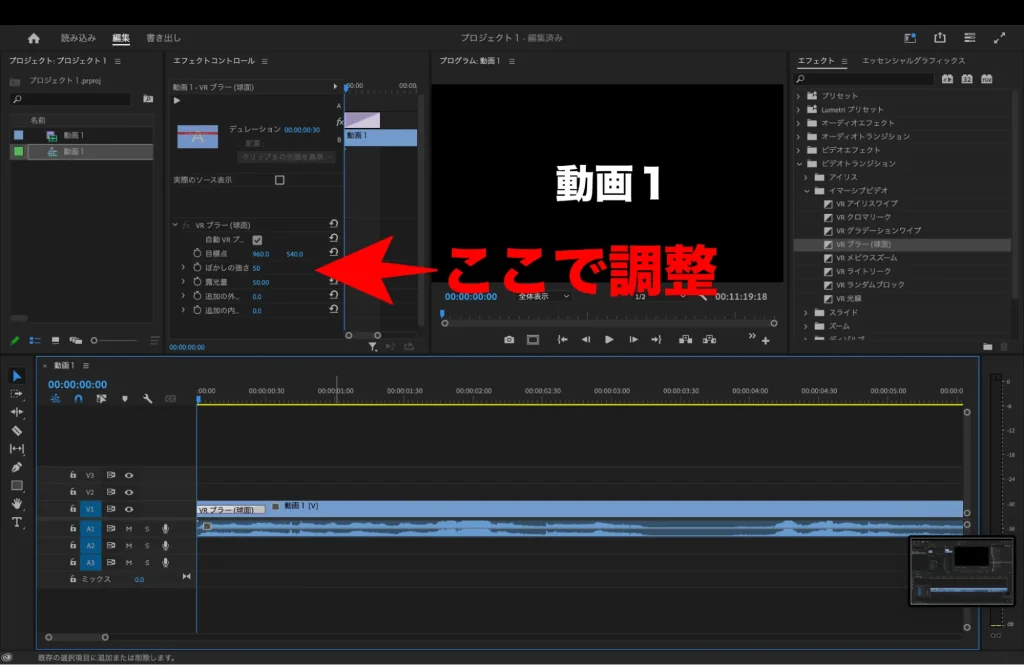
In the Effects Control Panel, adjust each property of the transition (e.g., direction, amount of blur, opacity, etc.).
The properties that can be adjusted differ depending on the transition.
The length and timing of transitions can be adjusted in the following ways.
On the timeline, click to select the transition you wish to adjust.
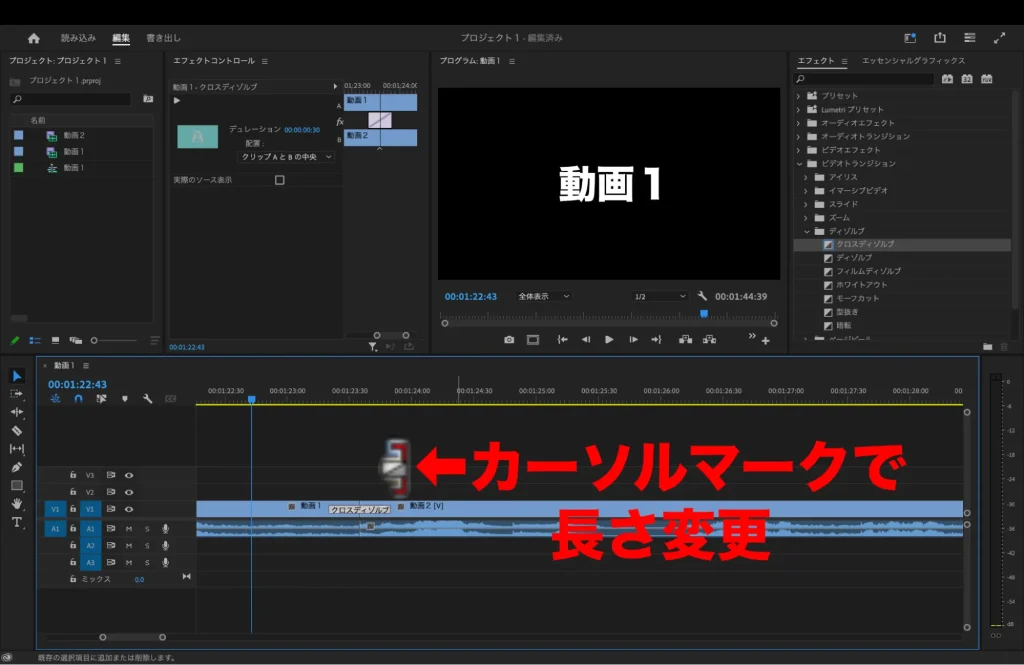
Move the cursor over the start or end point of the transition, and the cursor will change as shown in the image above. Drag the cursor to adjust the length of the transition.
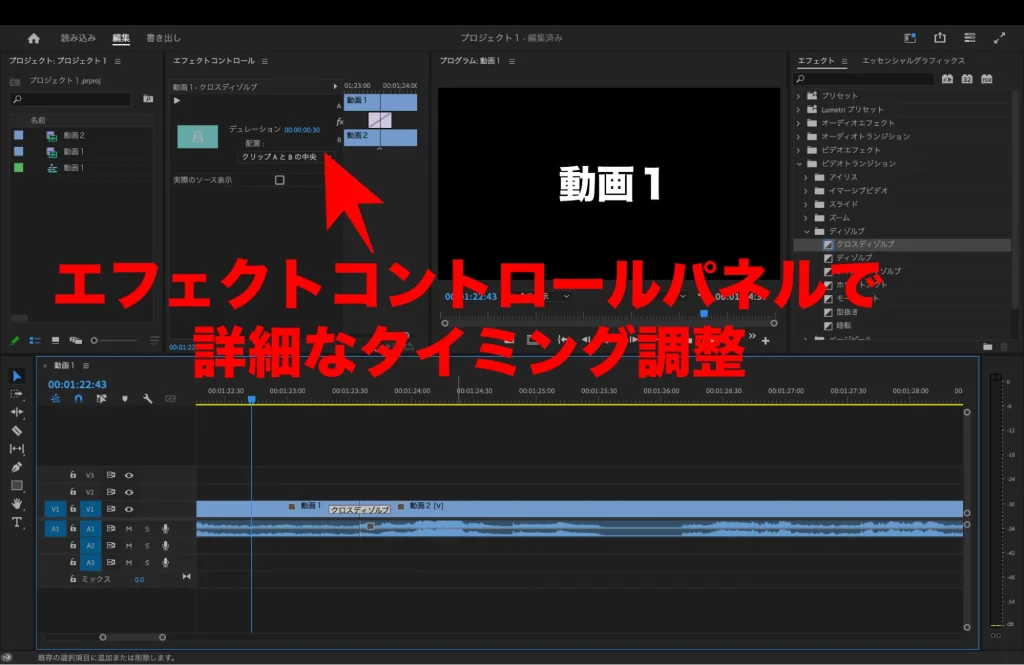
If more detailed timing adjustment is required, use the Effects Control Panel.
In this way, you can customize the transition settings in Premiere Pro.
Once you have inserted and customized basic transitions in Premiere Pro, it is time to try more advanced techniques.
This section explains how to combine multiple transitions and techniques for synchronizing transitions and music.
Transitions are an editing technique for switching between images, and can use not only Premiere Pro presets, but also materials imported from outside sources. By combining these transitions, a richer expression can be achieved.
However, the existing Premier Pro transitions do not allow multiple transitions to be combined. Therefore, you can combine them by inserting external transitions on a separate track.
First, select basic transitions provided in Premiere Pro or transitions imported from outside.
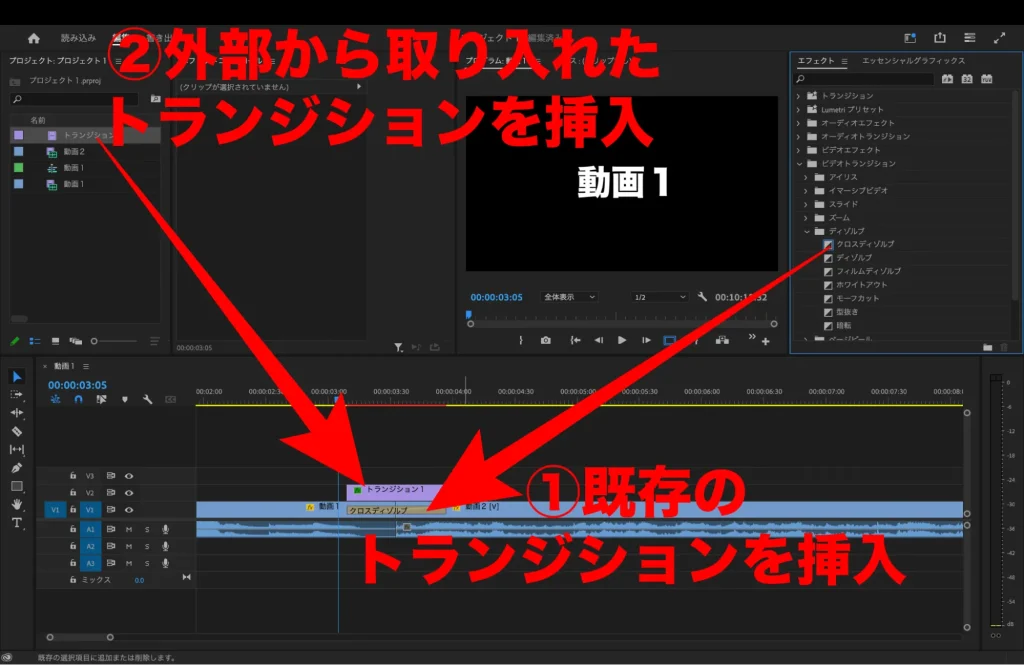
Transitions can be combined by inserting a transition on the track of video 1 and inserting a transition imported from an external source on the top of the track of video 1. By combining multiple transitions into a single scene transition, new transitions can be created.
Adjust the parameters of each transition so that the combined transitions look natural.
Preview the transitions you have created and make adjustments as necessary.
In this way, Premiere Pro allows you to add depth and dynamism to your video by combining multiple transitions. Transitions are “an editing technique for switching between images,” and you can create your own transitions as well as presets. Use this technique to create your own transitions.
Next, we will discuss techniques for synchronizing transitions and music.
Import music tracks to the timeline.
Markers are set on the timeline in time with the beat or rhythm of the music. Markers can be typed by pressing “M” on the keyboard.
Insert a transition at the point where the marker is set.
If necessary, adjust the start and end times of transitions to perfectly synchronize them with the music.
If necessary, adjust the start and end times of transitions to perfectly synchronize them with the music.
To achieve advanced transitions in Premiere Pro, you often need presets and templates. However, creating everything yourself can be time consuming.
So, below are five websites that distribute free transitions for Premiere Pro.

Artlist is a site that offers mainly music materials, but also offers a wide range of video materials and transitions.
Free materials are also available, but please note that paid plans are the main focus of the site.

Shutterstock Blog offers high-quality photo and video materials. Transitions are also available, some of which can be downloaded for free.
The main service here is also a paid plan.

Motion Array is a site that offers many transition presets for Premiere Pro. Many of the transitions are available free of charge and are recommended for those seeking professional results.

Mixkit is a site offering transition materials that is especially popular among Japanese users. With many free materials, it is ideal for those who want to create videos with their own unique style.
VIDEO MILKSHAKE offers a wide variety of video effects and transitions. Some of the materials are free, but for more versatile transitions, a paid plan must be purchased.
This section describes how to install and use the transition materials provided by the above transition distribution sites and others.
Materials can be installed in the following ways
If the downloaded materials are compressed in ZIP or other formats, unzip them.
Open the application and load the project you are editing.
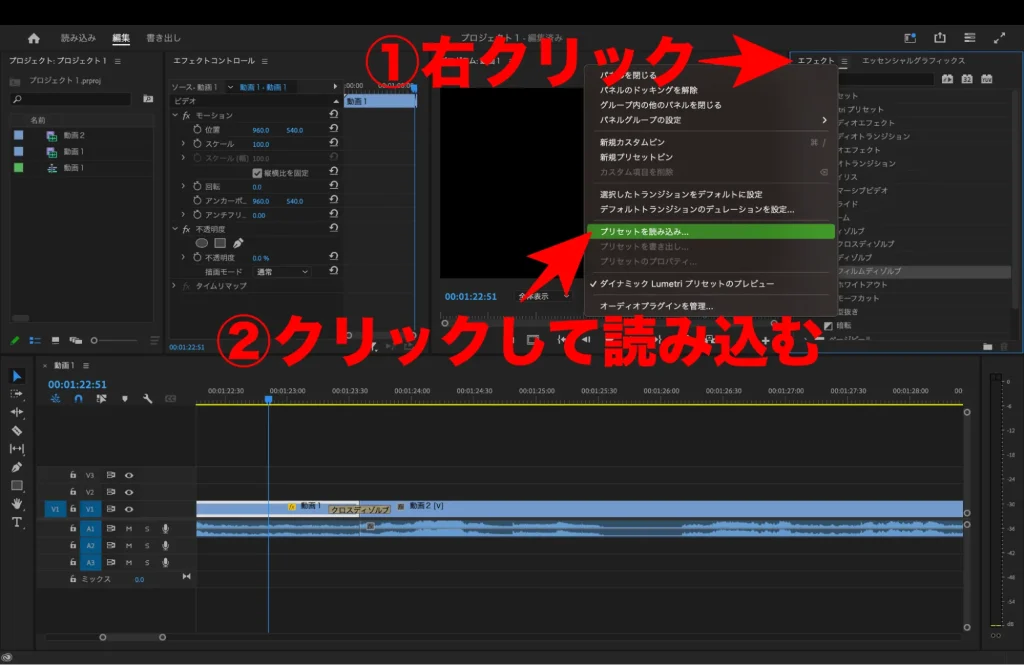
Open the “Effects” panel, right-click and select “Import Preset…”. Select the preset file you downloaded and import it.
The next section describes how to use the installed materials.
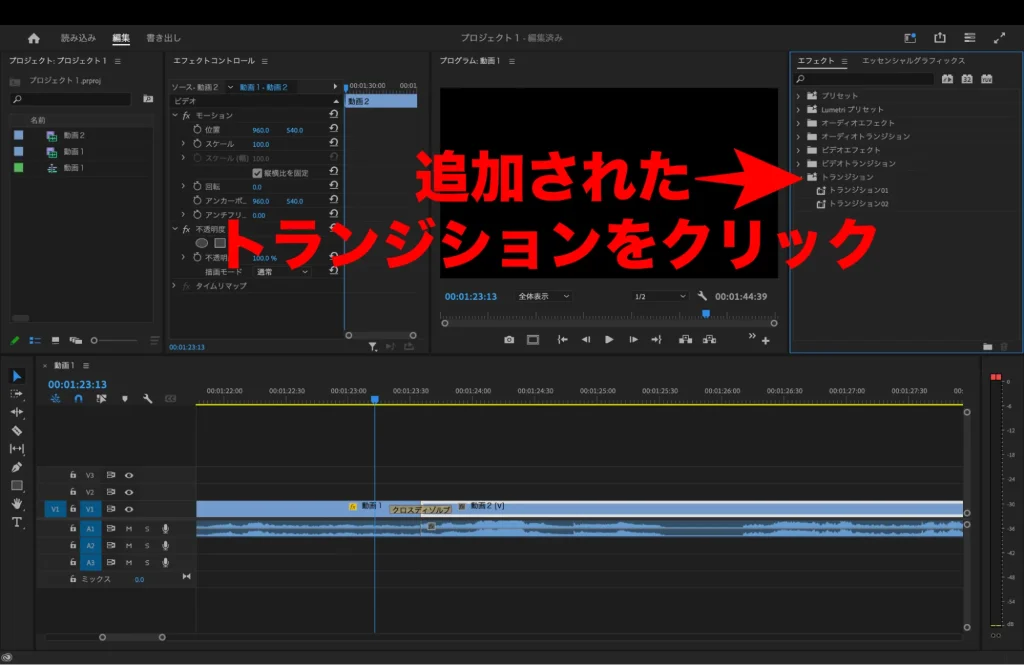
The imported preset will appear in the “Effects” panel.
Drag and drop the selected preset onto a clip on the timeline.
If necessary, adjust the preset properties in the Effects Control Panel.
In this way, you can effectively use the free transition materials you downloaded in Premiere Pro. In this way, you can easily use not only the default transitions, but also additional materials to create a wide variety of transitions.
This article covers the basics and applications of transitions in Premiere Pro, as well as free materials.
Transitions are more than just scene changes; they affect visual rhythm and storytelling. No matter how good a transition material is, it is useless if it does not fit the story or message.
When choosing transitions, it is important to carefully consider the effect they will have on the video as a whole. We hope this article will help you create effective transitions in Premiere Pro.
As you can see, Team HENSHIN provides information on video shooting, video editing, and special editing such as CG and VFX.
Please take a look at our other articles as well, as we provide detailed information on specialized techniques.
We also welcome your requests regarding filming and editing, so please feel free to contact us through our contact form.